While our island was locked down from late March pretty much to June, a small group in my Cupecoy community began tangling beside the pool … under a canopy, wearing our masks, and spread out enough to keep ourselves and each other safe from the contagion of the Covid19 pandemic. Some beautiful art has come from the sessions and personal tangling. Each tangle has her own style, each beautiful. Here is one, tangled by Ruby as her interpretation of Fengle took off.
We’ve also done embedded letters, and member-led sessions. Here are some beautiful examples of work by Ruby, Larissa, Vanessa, and Dorothy.
Unsurprisingly, Diva Dance Rock’n Roll was a favorite.
Vanessa liked Diva Dance’s rose-like quality so much that she added to a previous tile she was making for her mother’s birthday.
Vanessa added a stamped sentiment, some of her mother’s favorite colors, and some luscious golds.
Now that the island has opened up and everyone is busy with postponed errands, work and filling in for vacations, we may not be meeting as regularly, so I wanted to share some of the lovely works that came out of a few of our Wednesday morning sessions.
Hope you enjoyed seeing these as much as we enjoyed tangling them. Next time, I will share some of my experiments that have kept me busy and marginally same.
During the past several months, both during lockdown and while opening the island to its residents, some of my neighbors have been holding tangling sessions. We meet by the community pool and tangle for a couple of hours each Wednesday morning, following the recommended social distancing and wearing masks. Usually I lug my easel down and use the old fashioned teaching tool of drawing on large sheets of newsprint.
Today, two tangles we played with are Cadent and Huggins, loosely related in that the basics of both patterns start with “grids” of orbs. Here is how to start the basic grid and the most basic forms of the Cadent and Huggins patterns.
Orb grid and very basic stepouts for Cadent and Huggins
Today, everything we did was on scrap paper. So much about the plans to open our little island to international visitors was discussed that there was no time to produce any beautiful tiles. And this group produces gorgeous tiles!
Hope you enjoyed a short and direct post today. If these tangles are new to you, or if you have forgotten them, I hope the stepouts helped and inspired fresh ideas.
Last time, I shared my first attempt at combining Zentangle with die-cut shapes and using the same dies to emboss paper for further tangling. The type of embossing I did was basically molding paper around a figure that would raise the design from the paper.
Today, I played with a different kind of embossing. This method, which I have seen referred to as heat embossing, requires beautiful stamps (usually clear acrylic), a pad of clear embossing ink (thicker and dries more slowly than regular stamp pad ink), embossing powder, a crafting heat gun (workshop heat guns run too hot), and a bunch of little crafting and embossing tools that you don’t always hear about but are extremely helpful.
Helpful hint: When stamping, smooth card stock is a better choice than watercolor paper, even if you plan to add watercolor touches later. Unless you are planning to build an elaborate wet-on-wet watercolor painting around your stamped and embossed image, card stock stands up pretty well to watercolor techniques that don’t require rivers of water.
These are the supplies I used for my new project: Acrylic stamps, a stamping block, a stamp pad of pale gray or black or other color ink, clear embossing ink, a Micron 01 in black for tangling, watercolor brush pens, one or two water brushes filled with fresh clean water, embossing powder in your choice of either clear or color (even black), a small dry regular paint brush, gray brush pens and/or gel pens and/or graphite pencil for shading, and a craft heat gun. You may also want to have a container of clear water for rinsing water brushes, and some paper towels or a cloth in case you get too much water on your brush or paper.
The stamp I selected for my project is from a stamp set called Bloom and Grow, which was a joint project between Hero Art and Altenew. The set contains a flower that measures about 4×4 inches, with a separate leaf stamp and several sentiments. Here is a closer look at the set.
Because of the size of the flower, I decided to use a Zentangle Apprentice tile, which, at 4.5”x4.5”, is much smoother and larger than the traditional Zentangle 3.5”x3.5” tile — and the stamp fits on it so I don’t need to cut down a sheet of card stock.
After placing the tile on a grid-lined generic hinged stamper base, I arranged the stamp where I wanted it, closed the lid on the stamper, and let the cling stamp affix itself to the underside of the lid. Next, I inked the stamp, using a pale gray stamp pad because I wasn’t sure what I wanted to do. I used Rainy Day ink from Scrapbook.com , which gave me a pale imprint of the flower.
It took me a while to decide what I wanted to try next. Did I want to tangle the petals? Or did I want to paint them? If I tangled them, did I want to use the black or a colored Micron 01? Did I want to use one or two tangle patterns for the whole flower, or did I want to tangle each petal differently? Did I want to control shading with the density of the patterns, or would I simply tangle at will and shade afterwards?
What I did was tangle each petal differently. I varied density on some petals, and left others to be more traditionally shaded. Using Koi Coloring Brush Pens, I colored the petals, laying down water or using it after color to vary color intensity. As much as possible, I shaded as I painted, adding more shading at the end as it seemed needed. The combination of color and shade added some dimension to the image.
Once the color on the card stock was dry, I re-aligned the clear stamp on the printed one and put them both back into the hinged stamper. After wiping the prepared card stock surface with an anti-static bag (a sprinkle of cornstarch or baby powder works just as well), I inked the stamp well with clear embossing ink. Next, I sprinkled Ranger Embossing Powder in Rose Gold all over the inked surface. I slid the excess powder from the tile onto a sheet of paper and funneled the extra powder back into its jar.
Next, I pre-heated the heat tool. Once it was hot, I directed the hot air toward the embossing powder clinging to the embossing ink. The powder melted into a gold line image of the original stamping, adding a bit more dimension to the flower. Where needed, I added some deeper gray to deepen the shadows, especially around areas where the embossing seemed to take away some depth.
Finally, I hand added a few leaves and colored them. Finally, the tile was finished!
If you look closely, you can see the raised gold line embossed around each petal.
As our Sint Maarten lockdown continues, I will be sharing more of my experiments with tangling and paper crafts. Please join me on this Re-directed journey of discovery. And…
Yes, it’s been a long time. Each day, I’ve told myself I would share what I’ve done here on my blog. Every day, something has come up, or some distraction would keep me from this blog. Today, I decided to share my latest tangling explorations.
Recently, I have been investing in scrapbook and card-making supplies. It started with new-to-me ways to color and distress tiles. It continued with figuring out how to incorporate beautiful card-making and scrapbooking techniques into my Zentangle®️ Inspired Art (ZIA).
Here’s what I finished today.
Easter tangled designs using Spellbinders®️ FiligreeEgg Die D-Lies die as two-piece die for lower left egg and as embossing for lightweight watercolor paper for upper right eggs
The pink and aqua eggs sheet was my first stab at embossing with a die instead of an embossing folder. (Pause) … OK. It’s my first time embossing anything; ever. And I need to differentiate here between the use of the term embossing when the intended result is to raise an image from the fibers of a piece of some type of paper or metal tape, and the embossing that involves pouring powdered embossing crystals over stamped or drawn wet ink—especially clear embossing ink—and then heating the image/sentiment with an embossing heater. The heat literally melts the crystals, leaving behind a colorful or glossy raised image wherever the embossing ink was used. My current project involves the use of only paper and dies, run through a die-cutting/embossing machine. (The heat embossing version is something I am saving for tomorrow.)
This Spellbinders®️ die duo features a filigree design with beautiful cut-outs, and a second die which cuts out the filigreed egg shape , cuts a solid egg (perhaps in a contrasting or coordinating color) to use behind the filigree design, or used with the filigree section at the same time to cut out the filigree area as a bordered design, as I did twice for the image on the black Zentangle®️ tile in the photo. I offset a Spring Green egg with a darker green one underneath to produce a slight shadow effect, then used a Sakura®️ Gelly Roll pen in one of their newest colors (XPGB06#431) to outline the egg and all the filigree designs inside to give a slightly greater sense of depth to the egg. The tile itself was then classically tangled using traditional Zentangle patterns in both the darker teal-like color and a brighter and lighter new green color release (XPGB06#432).
Once the color dried, I used organic Zentangle patterns that coordinated with the Zentangle-like patterns of the egg to surround the eggs. This not only showcased the eggs, but also surrounded them in a sort of nest of tangled foliage.
Purchasing information
I purchased my Big Shot from Scrapbook.com over a year ago during a fabulous sale. It came to me bundled with a wonderful assortment of nested tiles in a variety of traditional geometric colors. The bundles at Scrapbook.com are numerous and varied, to fit most needs. The Spellbinders die set also came from Scrapbooks.com, but only very recently. It was on sale, and I couldn’t resist the good price. Although the design seems very Easter-sh and seasonal, I manage to think of all sorts of ways to use my “seasonal dies” out of season, and have all sorts of plans for this set.
Although I had been purchasing many of my art supplies through Amazon.com, usually at great prices, I am finding myself using specialty sites more and more often. For example, I purchase a lot of my crafting supplies through Scrapbook.com, where there are often sales going on that bring the cost down. Inking and color supplies—from ink and pens to color and paints—are often purchased from JetPens.com. What I like about these sites is that every order comes in a single box instead of Amazon’s policy of shipping from multiple locations, with items often arriving days apart or in so many boxes and packages that my neighbors are threatening to raise our trash allotment costs because of the space the extra boxes take up. We live in a small gated community on the Caribbean island of St. Martin. Most of our mail and packages come by way of courier services from Florida. My Amazon Prime membership may save me money on shipment to Florida, but the added cost of shipping almost empty and often oversized boxes this way ends up costing more than the combination of shipping costs from smaller specialty companies plus courier costs for fewer packages.
For supplies more suited to card making, I am finding Altenew.com to be a grand place to shop. Their inks, paints, stamp pad sets, and fabulous stamps and stamp-and-die sets are not inexpensive, but are of high quality and absolutely incredible. Their stamp sets produce professional watercolor results from a single stamp set. They offer all sorts of classes, monthly “clubs” for various project types, and stamp pad, watercolor paints, alcohol and other markers—all color media—that coordinate among themselves. You never need to worry of your alcohol ink will match your watercolor brush marker or your stamp pad because they are perfect matches. This brings incredible versatility to your art and your crafting projects. And if you purchase directly from hem, all sorts of rewards and discounts await you. Even as a die-hard tangler, I have fallen in love with Altenew products and their versatility and color ranges. Mainly stamps and even dies lend themselves beautifully to tangling projects.
There are other places that my Zentangling friends have recommended, and I will try them at some point, too. But I think I have found the best of the best for my current needs. And the customer service at each company listed is superb.
In the next post, I hope to share some more of not only the ZIAs (Zentangle Inspired Art, in case you’ve forgotten) using crafting and inking supplies, but also more traditional projects inspired with special twists from an art club (Eni Oken’s Art Club) I joined last year to learn more about both art and the art of Zentangle. Other lessons and groups I’ve joined will be spotlighted as I dig into Zentangle and art, especially during this crazy period in our world’s environment.
Keep safe, practice social distancing, wash your hands, wear your masks, and keep on tangling!
So, it’s the last day of 2019, and I have been thinking about high focus tangling. A lot.
A tangle pattern does not need to be difficult to be high focus. Any stroke or combination that is difficult for you (not necessarily for someone else) is high focus, at least initially. For me, any pattern that requires auras is high focus. Even when I maintain my focus, strokes don’t always come out the way I want them to. But that’s OK, because there are no mistakes with Zentangle.
One of the loveliest projects to come out of Zentangle HQ is something called Embedded Letters, tagged #EmbeddedLetters. This project relies heavily on auras. Interestingly enough, even if the auras aren’t perfect, and even without shading, the result is lovely. Here are a few examples of my own embedded letters.
As you can see, they are not perfect, yet the people for whom they were created seem to love them. And I have gone on to embed whole names.
Here is how to get started with your own embedded letters project.
1. Create an outline of the letter (or word) you want to embed.
2. Fill in the outline.
3. Aura around the filled letter(s).
4. Add some embellishments. The easiest is to add a few fescue around the edge. Weight the bottom of the fescue to give it a feel of old fashioned engraving. Add as many as you like, wherever you like.
5. Aura around that embellished layer.
6. Add another layer of embellishments, maybe adding some flux and perfs (or pearls) to fill in spots too small to add other patterns to. Then aura that. Or just add several auras. As you gain confidence, add bits of other patterns. Whatever you do will look great.
Lastly, shade as desired–or don’t shade at all. Either way, you have completed a project that took a bit of focus, a few simple strokes, and a lot of yourself.
Tangling isn’t difficult, but it does take mindfulness to keep strokes even or balanced. The mindfulness is meditative and relaxing. Using the whole 8-step Zentangle Method, from gratitude for time, place, materials in step 1, to appreciation of your accomplishment in step 8, helps to calm your anxieties and stress, at least for a little while.
Happy 2020 to you and yours. As always, Happy Tangling!
As you can probably guess, a high focus tangle is a pattern that requires more than just half of your attention. In fact, if you let your focus drift too much on a high focus pattern, chances are high that you will utter “Oops!” followed by the Zentangle mantra, “There are no mistakes in Zentangle.” You might even add that an “oops” is an opportunity to do something different or try something new.
The starts of two high focus patterns, Rumpus in the center flanked by Arukas, are pictured above. These are difficult on a traditional 3.5 inch square tile (shown on the left for comparison), but become ultra high focus when done on a Zentangle Opus tile. The Opus tile measures three regular tiles across by three down, or 10.5 inches square. Sometimes, when enlarging a pattern in a sketchbook or on an Opus tile, the challenge is to keep in mind exactly where the pen is to end up, as the destination is often covered or obscured by the very hand that is doing the drawing.
For example, just to get this much of the beginning of my tile onto the Opus tile, I counted seven “Oops!” utterances before I stopped counting–the counting was just too distracting! Since my intent is to end up with a frame-able tile, the No Mistakes mantra is probably embedded into the tile itself.
These two tangles are not particularly difficult to master–and I have them down for the traditional tile sizes–but Arukas is primarily inner auras while Rumpus (at least, the way I have drawn it here) is primarily long double Cs or Ss, diverging at the beginning and converging at the end. An easier, and just as pretty, way to draw Rumpus is with doubled lines that are joined with a curve at each end, essentially creating long, thin oblongs; or the doubled line can be connected with points to generate a ribboned effect. Both of these effects can be seen on the new gray traditional sized tile (3.5 inch square) in the basic Rumpus sketch below.
The tangle Rumpus doesn’t end here. As presented in the official step-out for this pattern, it is filled with pearl-like orbs, then richly shaded. If you have the Zentangle Mosaic app on your mobile device, you can see the official step-outs for both Rumpus and Arukas there. If not, here is a Pinterest link for Rumpus that will help: https://pin.it/bz2wa5n6mj5icx ; and one for Arukas: https://pin.it/y6ikp7r6mrlp62 .
Auras are easy, right? You learned about auras with your very first pattern, Crescent Moon. First you created the half-circle and filled it in; next you drew an aura along the curve. You’ve been aura-ing ever since. And so have I, but auras continues to be difficult for me, as I can barely trace well, let alone draw an outline of whatever I just drew. So for me, anything with an aura is a high focus pattern–even Crescent Moon! But that never stops me from taking on even the toughest-looking pattern.
Thankfully, Zentangle is not about the difficulty of the tangle or tile, but about your journey as you learn and conquer more challenging patterns. The step-outs learned during classes and workshops, or online via YouTube or tangle sites, make all the difficult patterns easy to recreate on your own.
I am afraid to look at when I posted my last blog. Please forgive my long absence. It’s been a roller coaster ride for over two years. We’ve finally finished the rebuilding of our home, and are still putting finishing touches on it. One project I’ve been working on is creating lots of Opus tiles (3 standard tiles wide by three high) and those are coming along slowly because they are in color, and I am learning about art and color theories as I go along.
Here is the unframed version of my first Very own Opus tile–and the framed version is nothing short of fabulous.
This is the first of at least four, all different, all sharing one or more elements, all only partially complete. As I said, I research and learn art techniques as I need them–because I was not trained in art–but they will all be used in future work.
Today’s post is to let you know I am back–no patterns or techniques to share. But that is only today.
Follow me on my journey of mindful meditation through learning and rebuilding. As I learn, the information I am allowed to share will be shared with you, my readers. Whether those are new tangle patterns or tangling embellishments, or whether they are art tips and “tricks,” all will be presented here a bit at a time.
Meanwhile, taking a page or two from several of my tangling friends, I am considering giving live and taped (Incase you miss the live one) online classes. What are your thoughts? Would you be interested in something like that? Et me know what you think, and what you would like to learn if you are interested in online classes. Just say something in the comments section below, and maybe we can get some discussions going.
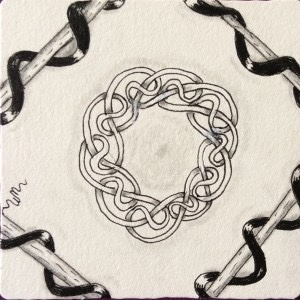
For a couple of weeks, I have been trying to chase down a lovely tangle by CZT Margaret Bremner called Skye. It reminds me of a Celtic knot in that it seems to be one continuous line.
[Update: A kind reader has found and sent the link to Margaret Bremner’s original step-out to Skye, which also features beautiful tiles tangled with Skye. Click here to access Margaret Bremner’s version, which is very similar to mine, but may be better/easier to use.]
Although there are several videos on YouTube (search term used: tangle pattern Skye), a Google search came up with no step-outs for Skye, regardless of search wording; and no step-out for Skye appears on TanglePatterns.com). And no matter how good the video, I kept messing up and really thought I needed the step-out to follow step by step without constantly having to pause and advance videos.
By the way, the YouTube video that I found most helpful can be found here. ( https://youtu.be/os0Js_gB0dw ) This tangle looks far more complex than it actually is, by the way. You will amaze yourself in the end.
Since searching yielded no step-out, I thought I would create my own, especially for when I need a reminder of how to tangle this pattern. Red lines indicate new additions.
This step-out is drawn in columns instead of the traditional tile-like steps. So, start with a column of backward Ss, leaving a little space between each one. Note that the top curve of the backward S is smaller than the lower curve. Next, the curve is auraed (haloed or replicated close by), starting outside the smaller curve and ending on the inside of the lower curve, in effect putting a larger curve at the top and a smaller one at the bottom.
Skye is a series of S curves, both backward and forward. They are “woven” using the Hollibaugh effect, the Zentangle term for drawing so it looks like something is going behind or under. A hint for this tangle is to draw the inside of the curved tubes first (right-hand line on the left side of the chain of backward Ss, left-hand line on the right side). This closes the backwards S tubes and helps guide the drawing of the lines.
Finally, connect the start of the tubed curve from nowhere under (behind) the bottom end of first backward S. At the bottom of the chain of backward Ss, and again starting under/behind, connect the top of the bottom backward S around the outside of the S, to the open tube left at the bottom of the fourth step-out column.
Some tanglers “get” this pattern right away. Others, like me, are distracted by openings to be Hollibaughed later, or some other reason; we have a more difficult time with this pattern. But once we get it, it becomes fun and really easy to tangle.
Skye can also be used as a string for tangling:
or (especially if you mess up like I did) become part of a background to be tangled over:
Hope my step-out of Margaret Bremner’s tangle Skye helps you enjoy this beautiful and flowing tangle. I am only starting to experiment with it. Hopefully I will soon be tangling variations and using it in more ways than I have illustrated here.
If you have any questions or suggestions regarding this step-out or Margaret Bremner’s pattern Skye, please leave a comment. I will do my best to address your comment. I am already working on a more detailed step-out that should need no verbal directions.
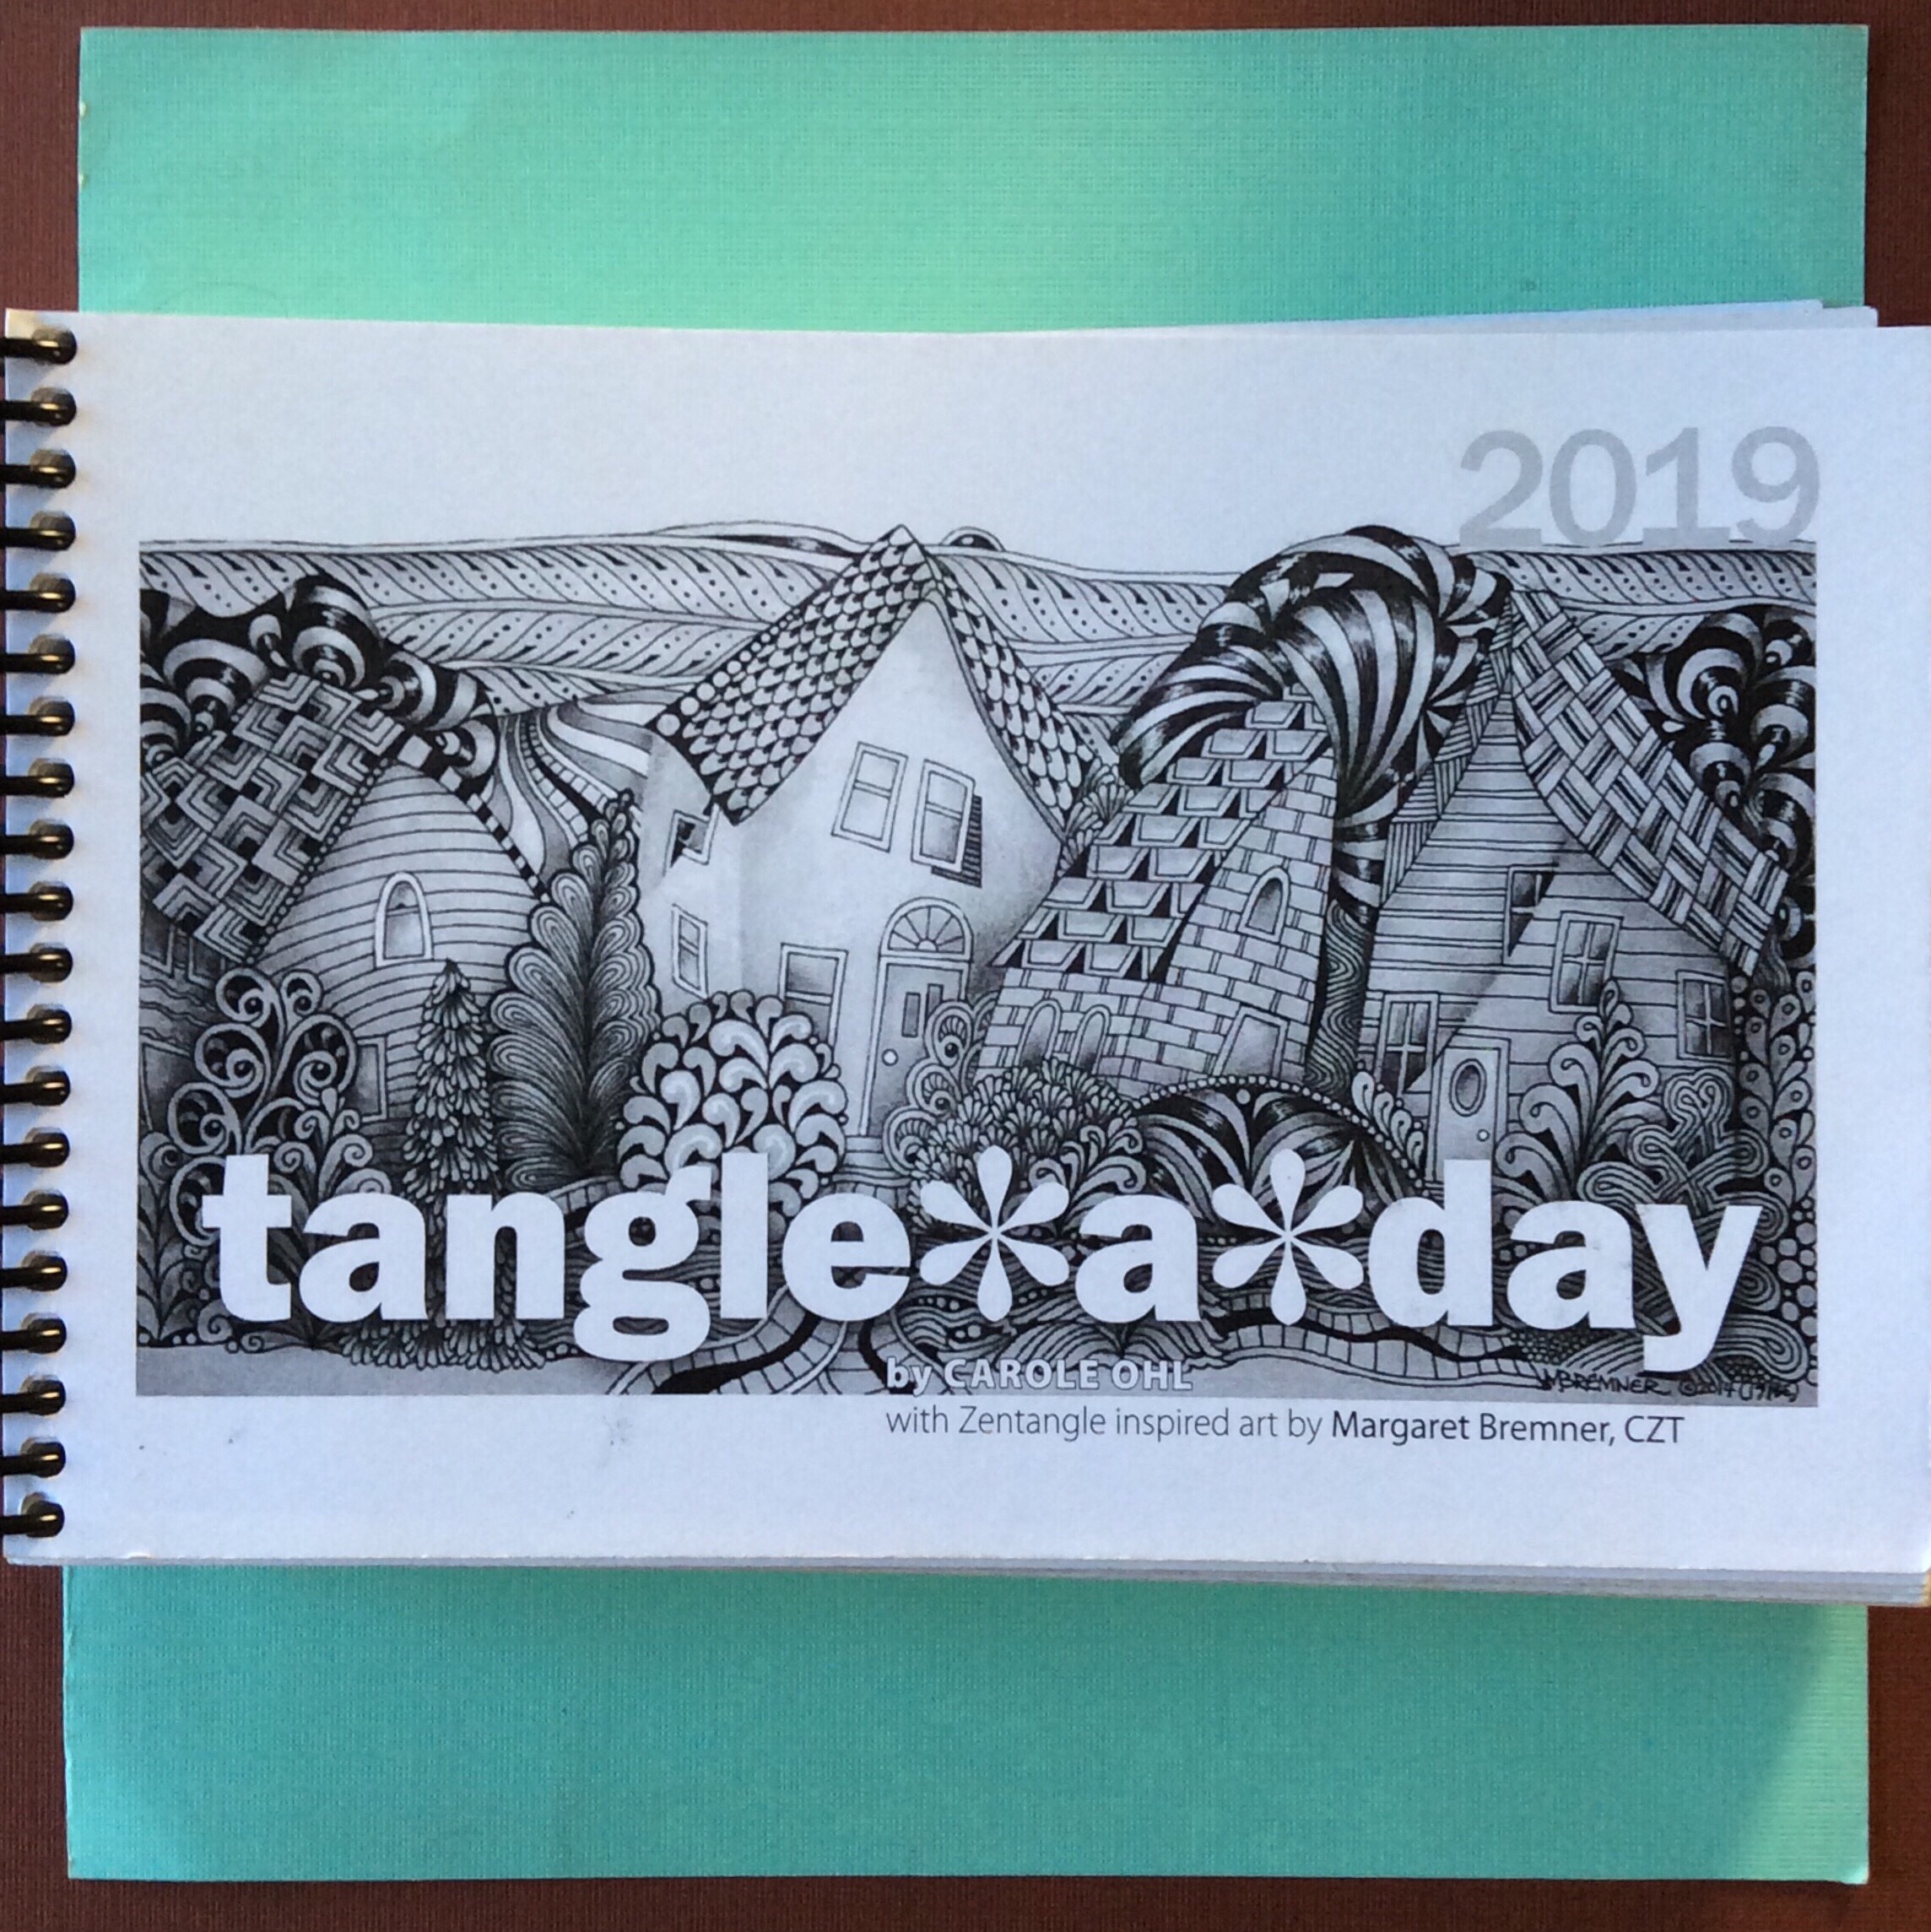
Looking for a way to help you make time for tangling every day? How about a calendar?
There are two ways to go with tangling calendars: 1) buy an “official” Tangle-a-Day calendar created annually by Certified Zentangle Teacher (CZT) Carole Ohl (2019 calendar is US$ 22.50, plus shipping, available online from this vendor ) or make your own using a sketchbook (from about US$10.00 at art shops or office supply stores in Sint Maarten) or even unlined paper, if price is a major consideration). Top Carrot restaurant in Simpson Bay/Cole Bay has a beautiful assortment of sketchbooks from about $12 or $15.
Here are the cover and a sample tangling page from Carole Ohl’s calendar.
The spiral-bound calendar measures 5×8 inches, and is printed on a decent quality of drawing paper. The pre-drawn tangling spaces are about 2.5 inch square (about 6.5 cm) under the date. Many tanglers tangle the numbers, too, or increase the tangling space by simply tangling over the numbers as though they aren’t there because the lines are printed in gray to resemble graphite pencil. It is also easy to tangle two or three days together. Below are some examples from my own calendar, showing individually and multiply tangled squares on a page.
These calendars are really convenient for tangling each day, but have two drawbacks. First, the cost is fairly high. Second, if you tangle across multiple squares, you can’t erase the printed lines if they get in the way of your tangling, especially if you are using a large, open pattern. Certainly, you can cover the lines with ink or color pencils or pens. But if the pattern ends up straddling the line, sometimes even shading won’t cover them. I realized that today as I tangled this page, where the number lines cut right through parts of the tangling that I couldn’t or didn’t want to shade:
So I worked up a page in a sketchbook to sort of replicate the calendar using pencil to separate the days. The pencil can be blended into shading or erased from a string or pattern.
The approximate page size of this sketchbook is 15×21 cm, or about 6×8.25 inches. I measured off and centered across the page three blocks that measure about 2.5×2.5 inches (6.5×6.5 cm) near the bottom of the page, added an inch (2.5 cm) for the date numbers, and left the top open for the month name, if I want to add it. Everything is drawn in pencil so I can erase or blend in date or border lines if I want so they don’t interfere with whatever patterns I tangle there.
Like in the printed calendar, you can start the first of the month on a new page, or you can simply add it to the end of the previous month’s last page–especially for months with 31 days. In the printed calendar, the 31st day is always on its own page, with plenty of white space to keep tangling.
Although the printed calendar has some lovely tangles on a few separator pages, another drawback is that the pages are printed on both sides. If your tangle has large areas of black ink, or if you use markers or watercolors, there can be bleed-through to either the next page or to tangles you have already drawn. Creating your own calendar gives you the option to choose whether your pages are one-sided or two-sided. If you decide to use one-sided pages, make sure your sketchbook has more than 120 sheets, or buy two sketchbooks, or choose a larger size sketchbook that allows you to draw more calendar squares on a page.
That’s all there is to creating your own beautiful tangle-a-day type calendar!
Wow! What a terrific Zentangle class last night at MHF!
Seven students and a staff member participated and produced these fabulous First Tiles.
Tangled on a Z string, each fabulous individual tile produced this beautiful mosaic of their unique styles.
We started with Crescent Moon for the auras and Hollibaugh for the under/behind technique. Then we went on to Printemps (spring) and finished with the grid tangle Florz. We used the new Micron PN pens and, of course, the traditional Zentangle 2B artist pencil. Because I was afraid we would run out of time, we shaded each pattern as we finished it, and used the tortillion to smooth out the graphite shading in various ways.
Unfortunately, we did not have the opportunity to hear Rick Roberts’ “Zentangle Sounds” album, as the PC we were using didn’t seem to want to play anything. However, I think my voice is soporific enough to soothe, and it certainly kept everyone working. Admittedly, I get so into the Zentangle Method®️ when I teach a class that I mellow out and almost– only almost– forget there are others in the room. Next time we will have the soothing original music playing.
I so enjoyed working with this group of people who were so certain they didn’t know how to draw. Gladly, each was proud of the tile he or she produced. Wonderful group, fabulous participants!